Instructions For Use
BREAST BIOPSY SOLUTIONS
Hologic Ltd.
Heron House Oaks Business Park, Crewe Road
Wythenshawe, Manchester. M23 9HZ, UK
P
Hologic, Inc. | 250 Campus Drive | Marlborough, MA 01752 USA
877.887.8767 | www.hologic.com
M
Breast Biopsy Device
0086


Celero® Biopsy Device
Instructions for Use
Please read all information carefully. Failure to properly follow the instructions may lead to
unintended consequences.
Important: This package insert is designed to provide instructions for use (IFU) for the Celero
breast biopsy device. It is not a reference to surgical techniques.
Indications (Product codes: Celero-12 and Celero
INTRO-12 (if applicable))
The Celero breast biopsy device is indicated for use to obtain
percutaneous core biopsy samples from soft tissue and tumors of the
breast. This product is intended for diagnostic use only.
Contraindications
Sound professional judgment should be used for patients where
increased risk or complications may be associated with biopsy based
on the physician’s judgment, such as patients receiving anticoagulant
therapy or those who have known bleeding disorders.
Device Description
The Celero breast biopsy device is a vacuum-assisted spring loaded
core biopsy device which is used to obtain percutaneous core biopsy
samples from soft tissue. The Celero breast biopsy device is designed
for biopsy and diagnosis only. The device is for single-patient use and
the entire handpiece is fully disposable. The device primarily consists
of a hollow inner cannula with a side aperture and a sharpened outer
cannula that extends at high speeds over the aperture to acquire
targeted tissue. During this process, vacuum is generated inside the
inner cannula to assist in pulling tissue into the aperture. An introducer
system, including a stylet, specifically designed for use with the Celero
breast biopsy device is provided separately. This introducer system pro-
vides single insertion access to the targeted area of interest and assists
in deploying biopsy site identification systems. The Celero breast biopsy
device is designed to acquire a maximum of 10 tissue cores.

Device preparation (all steps to be performed per
standard intervential technique)
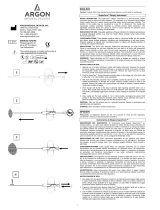
1. Prior to use of the Celero breast biopsy device, inspect the protective packaging and
device to verify that neither has been damaged during shipment. If it appears that the
packaging has been compromised, do not use the device.
2. Carefully remove the Celero breast biopsy device from its protective packaging.
3. Remove the protective sheath from the Celero breast biopsy device.
4. If it is desired to use the introducer system, remove it from its packaging and remove
its protective sheath.
5. Depress and release the black latch on the Celero breast biopsy device to release the
actuating lever.
6. Completely depress the lever once to retract the vacuum source.
7. Completely depress the lever a second time to retract the cutting cannula.
8. Completely depress the lever a third time to retract the inner cannula. The lever will
automatically latch. Do not proceed with the procedure if the lever does not automati-
cally latch at this point, as the device may not function properly.
9. Check the indicator window. If the window is green, the device is ready for biopsy. If
the window is not green at this point, do not proceed with the procedure, as the device
may not function properly.
Performing a Biopsy (all steps to be performed per
standard intervential technique)
1. Identify targeted area.
2. Prepare the site as required.
3. Insert the tip of the needle and advance to the desired location.
a. If using the optional introducer system, insert the introducer with stylet and advance
to desired location.
b. Remove the stylet, leaving the introducer in place. The stylet may be detached from
introducer by depressing the snap mechanism on the introducer hub.
c. Advance the Celero breast biopsy device needle to the targeted area by sliding it into
the introducer hub and snap into place.
NOTE: If desired, the inner cannula may be fired prior to insertion of the Celero breast
biopsy device into the patient.

Performing a Biopsy (Continued)
4. While maintaining the position and the needle orientation of the Celero breast
biopsy device, depress the green button to fire the inner cannula (25mm stroke).
5. Depress the blue button to fire the cutting cannula (22mm aperture) and obtain a
tissue core. Vacuum will be generated automatically during this step.
6. Remove the Celero breast biopsy device leaving the introducer in place (if ap-
plicable). The introducer may be detached from the Celero breast biopsy device by
depressing the snap mechanism on the introducer hub.
7. Depress the black latch to release the lever.
8. Completely depress the lever once to retract the vacuum source.
9. Completely depress the lever a second time to retract the cutting cannula and
expose the tissue core.
10. Retrieve the tissue core. The lever may be either fully depressed or fully released
when retrieving tissue cores.
NOTE: Caution when retrieving tissue cores from the aperture of the Celero breast
biopsy device. Do not place fingers near or within the aperture at any time during a
biopsy procedure, as the cutting cannula may be armed and could potentially fire,
resulting in user injury.
11. To obtain additional cores, completely depress the lever a third time to retract
the inner cannula and repeat steps 1-8 of this section.
12. If finished obtaining cores, remove the Celero breast biopsy device and intro-
ducer (if applicable) and properly dispose of them.
13. If a biopsy site marker will be placed, the introducer may be left in place.
14. If desired, deploy biopsy site marker according to manufacturer’s instructions
for use.

Warnings and Precautions
• The Celero breast biopsy device is not recommended for use with MRI.
• The Celero breast biopsy procedure should be performed only by persons having ad-
equate training and familiarity with this procedure. Consult medical literature relative to
techniques, complications, and hazards prior to performance of any minimally invasive
procedure.
• The Celero breast biopsy device should be used only by physicians trained in percuta-
neous biopsy procedures.
• Caution: Federal (USA) law restricts this device to sale by or on the order
of a physician.
• Sound professional judgment should be used when the Celero breast biopsy device is
used on patients with breast implants
• Avoid operator or instrument contact with the needle portion of the Celero.
• The Celero breast biopsy device should not be tested by “dry” firing the cutting can-
nula. Damage to the device may occur, dulling the cutting edge.
• In the event of changes in the performance of the device, please dispose of the
device and resume the procedure with a new device.
• Minimally invasive instruments and accessories manufactured or distributed by
companies not authorized by Hologic, Inc. may not be compatible with the Celero breast
biopsy device. Use of such products may lead to unanticipated results and possible
injury to the user or patient.
• Instruments or devices which come into contact with bodily fluids may require special
disposal handling to prevent biological contamination.
• Dispose of all opened instruments whether used or unused.
• Do not resterilize and/or reuse the Celero breast biopsy device. Resterilization and/or
reuse may compromise the integrity of the instrument. This may lead to potential risks
of failure of the device to perform as intended and/or cross-contamination associated
with using inadequately cleaned and sterilized devices.
• Potential complications are associated with any percutaneous removal/biopsy tech-
nique for tissue collection. Potential complications are limited to the region surrounding
the biopsy site and include hematoma, hemorrhage, infection, pain and tissue adher-
ence to the biopsy probe while removing it from the breast.

How Supplied
The Celero breast biopsy device is sterilized by gamma radiation and supplied for single
patient use. Discard into an appropriate container after use.
As Identified on Labels:
Number of Devices Enclosed.
YYYY-MM-DD Expiration date is represented by the following:
YYYY represents the year
MM represents the month
DD represents the day
For More Information
For more information on the Celero, U.S. and Canadian customers can contact the
Hologic Customer Support Department at: 1-877-887-8767 or csupport@hologic.com.
International customers, please contact your local distributor.
© 2014-2017 Hologic, Inc. Hologic, The Science of Sure, Celero and associated logos are trademarks and/or registered
trademarks of Hologic, Inc. and/or its subsidiaries in the United States and/or other countries.
AW-09256-002

Indicaties (productcodes: Celero-12
en Celero INTRO-12 (indien van
toepassing))
De Celero is geïndiceerd voor gebruik voor het verkrijgen
van percutane naaldbiopsiemonsters van weke delen en
tumoren in de borst. Dit product is is uitsluitend bestemd
voordiagnostisch gebruik.
Contra-indicaties
Voor patiënten waarbij een verhoogd risico of complicaties in
verband kunnen worden gebracht met biopsie op basis van
het oordeel van de arts, moet dit gedegen en professioneel
worden beoordeeld, zoals bij patiënten die antistollings-
therapie ondergaan of bij wie sprake is geweest van
bloedingsstoornissen.
Omschrijving van het apparaat
De Celero is een vacuüm-ondersteund geveerd naaldbiopsiehu-
lpmiddel dat wordt gebruikt voor het verkrijgen van percutane
naaldbiopsiemonsters van weke delen. De Celero is uitsluitend
bedoeld voor biopsie en diagnose. Het hulpmiddel is voor gebruik bij één patiënt en
het gehele handstuk is volledig wegwerpbaar. Het hulpmiddel bestaat voornamelijk uit
een holle binnencanule met een zij-apertuur en een scherpe buitencanule die met hoge
snelheid over de apertuur schuift om doelweefsel af te nemen. Tijdens dit proces wordt
er een vacuüm gegenereerd in de binnencanule voor hulp bij het ophalen van weefsel
in de apertuur. Een inbrengsysteem, dat een stilet bevat en speciaal bestemd is voor
gebruik met de Celero, wordt afzonderlijk geleverd. Dit inbrengsysteem biedt met een
enkele ingang toegang tot het beoogde interessegebied en biedt ondersteuning bij het
plaatsen van biopsieplaats-identificatiesystemen. De Celero is bedoeld voor het afnemen
van maximaal 10 weefselbiopten.
Celero® biopsiehulpmiddel
Gebruiksaanwijzing
Lees alle informatie zorgvuldig door. Het niet opvolgen van de instructies kan onbedoelde
gevolgen hebben.
Belangrijk: Deze bijsluiter is bedoeld als gebruiksaanwijzing voor het Celero biopsie-
hulpmiddel. De bijsluiter is niet geschikt als referentiemateriaal voor chirurgische
technieken.

Voorbereiding van het apparaat (alle stappen
moeten worden uitgevoerd overeenkomstig de
standaard interventionele techniek)
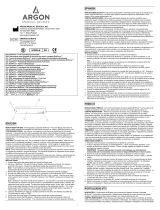
1. Voordat u de Celero gebruikt, moet u de beschermende verpakking en het hulpmiddel
controleren op transportschade. Gebruik het hulpmiddel niet als de verpakking lijkt te
zijn aangetast.
2. Neem de Celero voorzichtig uit de beschermende verpakking.
3. Verwijder de beschermhuls van de Celero.
4. Als u het inbrengsysteem wilt gebruiken, neemt u dit uit de verpakking en verwijdert
u de beschermhuls.
5. Druk de zwarte vergrendeling op de Celero in en laat deze los om de activerings-
hendel te ontgrendelen.
6. Druk de hendel eenmaal volledig in om de vacuümbron in te schuiven.
7. Druk de hendel een tweede keer in om de snijcanule in te schuiven.
8. Druk de hendel een derde keer in om de binnencanule in te schuiven. De hendel
wordt automatisch vergrendeld. Ga niet verder met de ingreep als de hendel niet
automatisch vergrendeld op dit punt, omdat het hulpmiddel dan mogelijk niet goed
werkt.
9. Controleer het indicatorvenster. Als het venster groen is, is het hulpmiddel gereed
voor biopsie. Ga niet verder met de ingreep als het venster niet groen is op dit punt,
omdat het hulpmiddel dan mogelijk niet goed werkt.
Uitvoeren van een biopsie (alle stappen moeten
worden uitgevoerd overeenkomstig de standaard
interventionele techniek)
1. Identificeer het doelgebied.
2. Bereid de plaats voor zoals vereist.
3. Breng de tip van de naald in en voer deze op naar de gewenste locatie.
a. Als u het optionele inbrengsysteem gebruikt, brengt u de inbrenger met het stilet in
en voert u deze op naar de gewenste locatie.
b. Verwijder het stilet en laat de inbrenger op zijn plaats. Het stilet kan van de inbrenger
worden afgenomen door het klikmechanisme op het aanzetstuk van de inbrenger in te
drukken.

Uitvoeren van een biopsie (vervolg)
c. Voer de Celero naald op naar het doelgebied door deze in het aanzetstuk van de
inbrenger te schuiven en vast te klikken.
OPMERKING: Indien gewenst kan de binnencanule worden gelanceerd voordat de
Celero in de patiënt wordt ingebracht.
4. Terwijl u de positie en de naaldoriëntatie van de Celero handhaaft, drukt u de groene
knop in om de binnencanule te lanceren (slag van 25 mm).
5. Druk de blauwe knop in om de snijcanule te lanceren (apertuur van 22 mm) en
een weefselbiopt te krijgen. Tijdens deze stap wordt er automatisch een vacuüm
gegenereerd.
6. Verwijder de Celero en laat de inbrenger op zijn plaats (indien van toepassing).
De inbrenger kan van de Celero worden afgenomen door het klikmechanisme op het
aanzetstuk van de inbrenger in te drukken.
7. Druk de zwarte vergrendeling in om de hendel te ontgrendelen.
8. Druk de hendel eenmaal volledig in om de vacuümbron in te schuiven.
9. Druk de hendel een tweede keer in om de snijcanule in te schuiven zodat het weefselbiopt
zichtbaar wordt.
10. Verwijder het weefselbiopt. De hendel kan zowel volledig ingedrukt of volledig
vrijgegeven worden bij het verwijderen van weefselbiopten.
OPMERKING: Wees voorzichtig wanneer u weefselbiopten uit de apertuur van de Celero
verwijdert. Plaats geen vingers nabij of in de apertuur tijdens een biopsie, omdat de
snijcanule zich in geladen positie kan bevinden en mogelijk kan worden gelanceerd,
wat kan leiden tot letsel bij de gebruiker.
11. Om extra biopten te verkrijgen, drukt u de hendel een derde keer volledig in om de
binnencanule in te schuiven en herhaalt u stap 1-8 van deze sectie.
12. Als u de biopsie hebt voltooid, verwijdert u de Celero en inbrenger (indien van
toepassing) en voert u deze volgens de voorschriften af.
13. Bij plaatsing van een biopsieplaatsmarker kan de inbrenger op zijn plaats worden
gelaten.
14. Indien gewenst kan de biopsieplaatsmarker worden geplaatst volgens de gebruiks-
aanwijzingen van de fabrikant.

Waarschuwingen en voorzorgsmaatregelen
• De Celero wordt niet aanbevolen voor gebruik met MRI.
• De Celero ingreep mag alleen worden uitgevoerd door personen met de juiste opleiding
die voldoende vertrouwd zijn met deze ingreep. Voordat u een minimaal invasieve
ingreep uitvoert, dient u de medische literatuur over de betreffende technieken,
complicaties en gevaren te raadplegen.
• De Celero mag alleen worden gebruikt door artsen die zijn opgeleid in het uitvoeren
van percutane biopsie-ingrepen.
• Let op: Volgens de federale wetgeving van de VS mag dit hulpmiddel
uitsluitend door of op voorschrift van een arts worden verkocht.
• Wanneer de Celero wordt gebruikt bij patiënten met borstimplantaten, moet dit
gedegen en professioneel worden beoordeeld.
• Voorkom dat de gebruiker of het instrument in aanraking komt met het naaldgedeelte
van de Celero.
• De Celero mag niet worden getest door de snijcanule ongeladen te lanceren. Dit kan
leiden tot bescha-diging van het hulpmiddel en ervoor zorgen dat de snijrand bot wordt.
• In het geval van veranderingen in de prestaties van het hulpmiddel dient u het
hulpmiddel weg te werpen en de procedure te hervatten met een nieuw hulpmiddel.
• Minimaal invasieve instrumenten en accessoires die worden vervaardigd of
geleverd door bedrijven die niet zijn geautoriseerd door Hologic, Inc. zijn mogelijk
niet compatibel met de Celero. Het gebruik van dergelijke producten kan leiden tot
onvoorziene resultaten en mogelijk letsel bij de gebruiker of patiënt.
• Instrumenten of hulpmiddelen die in aanraking komen met lichaamsvloeistoffen
dienen mogelijk op speciale wijze te worden afgevoerd om biologische besmetting te
voorkomen.
• Alle instrumenten, gebruikt of ongebruikt, waarvan de verpakking is geopend, moeten
worden afgevoerd.
• De Celero mag niet opnieuw worden gesteriliseerd en/of gebruikt. Door opnieuw
steriliseren en/of gebruiken kan de integriteit van het instrument worden aangetast.
Dit kan het mogelijke risico met zich meebrengen dat het hulpmiddel niet meer werkt
zoals bedoeld en/of dat er kruisbesmetting optreedt vanwege onvoldoende gereinigde en
gesteriliseerde hulpmiddelen.
• Bij elke percutane verwijderings-/biopsietechniek voor weefselafname kunnen
complicaties optreden. De mogelijke complicaties zijn beperkt tot de omgeving van de
biopsieplaats en omvatten hematoom, bloeding, infectie, pijn en weefseladhesie aan
de biopsienaald wanneer deze uit de borst wordt verwijderd.

Leveringstoestand
De Celero is gesteriliseerd met gammastraling en worden geleverd voor gebruik bij één
patiënt. Gooi deze na gebruik weg in een daarvoor bestemde bak.
Zoals aangegeven op labels:
Aantal geleverde hulpmiddelen.
YYYY-MM-DD Uiterste gebruiksdatum wordt als volgt aangeduid:
YYYY duidt het jaar aan
MM duidt de maand aan
DD duidt de dag aan
Voor meer informatie
Voor meer informatie over de Celero kunnen klanten in de VS en Canada contact
opnemen met de klantenondersteuning van Hologic op: 1-877-887-8767 of csupport@
hologic.com.
Klanten buiten de VS kunnen contact opnemen met de plaatselijke leverancier.
© 2014-2017 Hologic, Inc. Hologic, The Science of Sure, Celero en bijbehorende logo’s zijn handelsmerken en/of gedeponeerde
handelsmerken van Hologic, Inc. en/of haar dochterondernemingen in de Verenigde Staten en/of andere landen.
AW-09256-1501

Indications (Codes du produit :
Celero-12 et Celero INTRO-12
[le cas échéant])
Le dispositif Celero est indiqué pour obtenir des échantillons
de biopsie percutanée au trocart à partir des tissus mous et des
tumeurs du sein. Ce produit ne doit être utilisé qu’à des fins
diagnostiques.
Contre-indications
Une attention professionnelle particulière devra être observée
si le médecin estime que la biopsie pourrait entraîner un
risque accru ou d’éventuelles complications chez la patiente ;
par exemple, si la patiente est sous anticoagulothérapie ou
présente des troubles hémostatiques connus.
Description du dispositif
Le dispositif Celero est un dispositif de biopsie au trocart à
ressort et par aspiration utilisé pour obtenir des échantillons
de biopsie percutanée au trocart à partir des tissus mous.
Le dispositif Celero n’a été conçu qu’à des fins de biopsie et de
diagnostic uniquement. Ce dispositif est à usage unique ; l’intégralité de la pièce à
main peut être mise au rebut. Il se compose principalement d’une canule interne creuse
dotée d’une ouverture latérale, et d’une canule externe pointue qui se déploie très
rapidement à travers l’ouverture pour prélever le tissu ciblé. Au cours de la procédure,
une aspiration est générée à l’intérieur de la canule interne pour permettre d’attirer
le tissu dans l’ouverture. Un système d’introduction, incluant un stylet, spécialement
conçu pour être utilisé avec le dispositif Celero, est fourni séparément. Ce système
d’introduction offre un accès unique à la région d’intérêt voulue pour l’insertion, et aide
au déploiement des systèmes d’identification du site de biopsie. Le dispositif Celero est
conçu pour prélever jusqu’à 10 carottes de tissu.
Dispositif de biopsie Celero®
Mode d’emploi
Veuillez lire attentivement l’ensemble des informations. Le non-respect des instructions peut
avoir des conséquences non intentionnelles.
Important : cette notice d’utilisation est destinée à fournir des instructions quant à
l’utilisation du dispositif de biopsie Celero. Elle ne doit pas être utilisée comme document
de référence pour les techniques chirurgicales.

Préparation du Dispositif (ensemble des étapes à
réaliser conformément à la procédure standard)
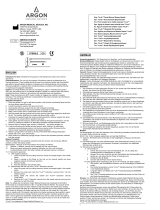
1. Avant d’utiliser le dispositif Celero, inspectez l’emballage de protection et le
dispositif afin de vérifier qu’ils n’ont pas été endommagés pendant le transport.
Si l’emballage est détérioré, n’utilisez pas le dispositif.
2. Sortez délicatement le dispositif Celero de son emballage de protection.
3. Retirez la gaine protectrice du dispositif Celero.
4. Si vous souhaitez utiliser le système d’introduction, sortez-le de son emballage et
retirez sa gaine de protection.
5. Enfoncez et relâchez le système de verrouillage noir du Celero pour libérer le levier
de commande.
6. Actionnez complètement le levier pour rétracter la source d’aspiration.
7. Actionnez complètement le levier une deuxième fois pour rétracter la canule
coupante.
8. Actionnez complètement le levier une troisième fois pour rétracter la canule interne.
Le levier se verrouille automatiquement. Ne réalisez pas la procédure si le levier ne se
verrouille pas automatiquement à ce stade car le dispositif pourrait ne pas fonctionner
correctement.
9. Vérifiez la fenêtre d’indication. Si la fenêtre est verte, alors le dispositif est prêt pour
la biopsie. Si la fenêtre n’est pas verte à ce stade, ne réalisez pas la procédure car le
dispositif pourrait ne pas fonctionner correctement.
Réalisation d’une Biopsie (ensemble des étapes à
réaliser conformément à la procédure standard)
1. Identifiez la région d’intérêt souhaitée.
2. Préparez le site comme requis.
3. Insérez la pointe de l’aiguille et faites-la progresser jusqu’au site voulu.
a. Si vous utilisez le système d’introduction en option, insérez l’introducteur
accompagné du stylet et faites-le progresser jusqu’au site voulu.
b. Retirez le stylet en laissant l’introducteur en place. Le stylet peut être détaché de
l’introducteur en appuyant sur le mécanisme de verrouillage situé sur la partie évasée
de l’introducteur.
c. Faites progresser l’aiguille Celero vers la région voulue en la faisant glisser dans la
partie évasée de l’introducteur et enclenchez-la.

Réalisation d’une Biopsie (Suite)
REMARQUE : si vous le souhaitez, la canule interne peut être actionnée avant d’insérer
le dispositif Celero dans la patiente.
4. Tout en conservant la position et l’orientation de l’aiguille du dispositif Celero,
appuyez sur le bouton vert pour actionner la canule interne (coup de 25 mm).
5. Appuyez sur le bouton bleu pour actionner la canule coupante (ouverture de 22 mm)
et obtenir un échantillon de tissu. Une aspiration sera automatiquement générée au
cours de cette étape.
6. Retirez le dispositif Celero en laissant l’introducteur en place (le cas échéant).
L’introducteur peut être détaché du dispositif Celero en appuyant sur le mécanisme de
verrouillage situé sur la partie évasée de l’introducteur.
7. Appuyez sur le système de verrouillage noir pour libérer le levier.
8. Actionnez complètement le levier pour rétracter la source d’aspiration.
9. Actionnez complètement le levier une deuxième fois pour rétracter la canule
coupante et exposer l’échantillon de tissu.
10. Récupérez la carotte de tissu. Le levier est soit entièrement actionné, soit
entièrement relâché lorsque vous récupérez les échantillons de tissu.
REMARQUE : il convient de faire preuve de prudence lorsque vous récupérez les
carottes de tissu depuis l’ouverture du dispositif Celero. Ne placez jamais vos doigts
à proximité ou dans l’ouverture au cours d’une procédure de biopsie car la canule
coupante armée pourrait s’actionner et vous blesser.
11. Pour obtenir des échantillons supplémentaires, actionnez complètement le levier
une troisième fois pour rétracter la canule interne, puis répétez les étapes 1 à 8 de
cette section.
12. Si vous avez terminé le prélèvement, retirez le dispositif Celero et l’introducteur (le
cas échéant) et mettez-les au rebut comme il convient.
13. Si un repère de site de biopsie doit être placé, l’introducteur ne doit pas être retiré.
14. Si vous le souhaitez, déployez le repère du site de biopsie conformément au mode
d’emploi du fabricant.

Avertissements et Précautions
• Le dispositif Celero n’est pas recommandé pour être utilisé avec l’IRM.
• La procédure Celero doit être exclusivement effectuée par des personnes parfaitement
formées et familiarisées à cette procédure. Consultez la littérature médicale relative aux
techniques, complications et risques avant d’effectuer une procédure très peu invasive.
• Le dispositif Celero doit uniquement être utilisé par des médecins formés aux
techniques de biopsie percutanée.
• Mise en garde : la loi fédérale (des États-Unis) limite la vente de ce
dispositif par un médecin ou sous sa prescription.
• Une attention professionnelle particulière doit être observée en cas d’utilisation du
dispositif Celero chez les patientes possédant des implants mammaires.
• Évitez tout contact entre l’opérateur ou entre l’instrument et la partie comportant
l’aiguille du dispositif Celero.
• Le dispositif Celero ne devra pas être testé en actionnant la canule coupante dans le
vide. Vous pourriez endommager le dispositif et émousser sa partie coupante.
• En cas de modification de la performance du dispositif, mettez le dispositif au rebut
et reprenez la procédure en utilisant un autre dispositif.
• Les instruments et les accessoires très peu invasifs fabriqués ou distribués par des
sociétés non agréées par Hologic, Inc. peuvent s’avérer incompatibles avec le dispositif
Celero. L’utilisation de ces produits peut générer des résultats imprévus et provoquer
des lésions chez l’utilisateur ou la patiente.
• Les instruments ou les dispositifs en contact avec des fluides corporels peuvent
nécessiter une procédure particulière d’élimination des déchets pour éviter toute
contamination biologique.
• Jetez les instruments ouverts, qu’ils aient été utilisés ou non.
• Ne restérilisez pas/ne réutilisez le dispositif Celero. La restérilisation et/ou la
réutilisation risquent de compromettre l’intégrité de l’instrument. Cela peut entraîner
un fonctionnement du dispositif non conforme aux attentes et/ou entraîner la
contamination croisée due à l’utilisation de dispositifs nettoyés et stérilisés de manière
incorrecte.
• Des complications possibles sont associées aux techniques de biopsie/retrait
percutané dans le cadre d’un prélèvement de tissus. Les complications possibles sont
limitées au périmètre du site de la biopsie et comprennent les hématomes, hémorragies,
infections, douleurs et adhérences des tissus à la sonde de biopsie lors de son retrait
du sein.

Présentation
Le dispositif Celero est stérilisé par rayons gamma et est destiné à un usage unique.
Jetez-le dans un récipient approprié après utilisation.
Mentions figurant sur les étiquettes :
Nombre de dispositifs inclus.
YYYY-MM-DD La date de péremption est composée des éléments suivants :
YYYY représente l’année
MM représente le mois
DD représente le jour
Pour Plus D’informations
Pour plus d’informations sur le dispositif Celero, les clients résidant aux États-Unis
ou au Canada peuvent contacter le service d’assistance clientèle Hologic au :
1-877-887-8767 ou via csupport@hologic.com.
Les clients des autres pays doivent contacter leur distributeur local.
© 2014-2017 Hologic, Inc. Hologic, The Science of Sure, Celero et les logos associés sont des marques de commerce déposées
d’Hologic, Inc. et/ou de ses filiales aux États-Unis et/ou dans d’autres pays.
AW-09256-901

Indikationen (Produktbezeichnungen:
Celero-12 und Celero INTRO-12
(sofern zutreffend))
Das Celero ist für die Entnahme perkutaner Kernbiopsieproben
aus Weichgewebe und Tumoren der Brust vorgesehen. Dieses
Produkt dient ausschließlich zu Diagnosezwecken.
Kontraindikationen
Bei Patientinnen, bei denen nach Einschätzung des Arztes ein
erhöhtes Risiko im Zusammenhang mit der Biopsie besteht oder
bei denen Komplikationen auftreten können, wie beispielsweise
bei Patientinnen, die sich einer Antikoagu-lanztherapie
unterziehen oder die unter bekannten Blutgerinnungsstörungen
leiden, ist gemäß gesundem ärztlichen Urteilsvermögen
vorzugehen.
Beschreibung des Geräts
Das Celero ist ein mit einer Sprungfeder versehenes,
vakuumgestütztes Biopsie-gerät, mit dem perkutane
Kernbiopsieproben aus dem Weichgewebe entnommen werden.
Das Celero wurde ausschließlich zu Biopsie- und Diagnosezwecken entwickelt. Das
Gerät ist zur Verwendung an einem einzigen Patienten vorgesehen; das komplette
Handstück ist ein Einmalartikel. Das Gerät besteht überwiegend aus einer inneren
Hohlkanüle mit seitlicher Apertur und einer angeschärften äußeren Kanüle, die blitzartig
über die Apertur ausgefahren wird, um Zugang zum Zielgewebe zu erhalten. Während
dieses Prozesses wird ein Vakuum in der inneren Kanüle erzeugt, um die Entnahme
des Gewebes in die Apertur zu unterstüzten. Ein Einführsystem mit einem Mandrin,
das speziell zur Verwendung mit dem Celero vorgesehen ist, ist separat erhältlich. Das
Einführsystem sorgt für einmaligen Zugang zum interessierenden Zielbereich und hilft
beim Einsetzen des entsprechenden Biopsiestellen-Ermittlungssystems. Das Celero ist
für maximal 10 Gewebekernentnahmen ausgelegt.
Celero®-Biopsiegerät
Gebrauchsanleitung
Bitte lesen Sie sich alle Informationen aufmerksam durch. Eine Missachtung der Bedienungs-
anleitung kann unvorhergesehene Folgen haben.
Wichtig: Dieser Beipackzettel enthält Hinweise zur Verwendung des Celero-Biopsiegeräts.
Er stellt keine Refe-renz für chirurgische Verfahren dar.

Vorbereitung des Geräts (alle Schritte sind
entsprechend den chirurgischen Standardverfahren
durchzuführen)
1. Vor Verwendung des Celero sollten die Schutzverpackung und das Gerät auf
Transport schäden untersucht werden. Das Gerät darf nicht verwendet werden, wenn die
Verpackung offensichtlich beschädigt ist.
2. Das Celero aus der Schutzverpackung entnehmen.
3. Die Schutzhülle vom Celero abnehmen.
4. Wenn das Gerät für die Verwendung mit dem Einführsystem ausgelegt ist, es
vorsichtig aus der Schutzverpackung entnehmen und die Schutzhülle entfernen.
5. Die schwarze Verriegelung am Celero drücken und loslassen, um den Betätigungs-
hebel zu lösen.
6. Den Hebel einmal vollständig herunterdrücken, um die Vakuumquelle zurückzuziehen.
7. Den Hebel ein zweites Mal vollständig herunterdrücken, um die schneidende Kanüle
zurückzuziehen.
8. Den Hebel ein drittes Mal vollständig herunterdrücken, um die innere Kanüle
zurückzuziehen. Der Hebel wird automatisch verriegelt. Fahren Sie nicht mit dem
Verfahren fort, wenn der Hebel an diesem Punkt nicht automatisch verriegelt, da das
Gerät eventuell nicht ordnungsgemäß funktioniert.
9. Anzeigefenster prüfen. Ist die Anzeige grün, ist das Gerät bereit für die Biopsie. Ist
die Anzeige zu diesem Zeitpunkt nicht grün, nicht mit dem Verfahren fortfahren, da das
Gerät gegebenenfalls nicht ordnungsgemäß funktioniert.
Durchführung der Biopsie (alle Schritte sind
entsprechend den chirurgischen Standardverfahren
durchzuführen)
1. Identifizieren Sie den Zielbereich
2. Bereiten Sie die Stelle nach Bedarf vor.
3. Führen Sie die Spitze der Nadel ein und schieben Sie sie bis zur gewünschten Stelle
vor.
a. Wenn Sie das optionale Einführsystem verwenden, führen Sie die Einführhilfe mit
dem Mandrin ein. Schieben Sie sie bis zur gewünschten Stelle vor.
b. Entfernen Sie den Mandrin und lassen Sie dabei die Einführhilfe in der gewünschten
Position. Der Mandrin kann von der Einführhilfe gelöst werden, indem der
Rastmechanismus an der Einführhülse heruntergedrückt wird.

Durchführung der Biopsie (Fortsetzung)
c. Schieben Sie die Celero-Nadel in den Zielbereich vor. Dazu schieben Sie sie in die
Einführhülse und lassen sie dort einrasten.
HINWEIS: Nach Bedarf kann die innere Kanüle vor der Einführung des Celero in den
Patienten ausgelöst werden.
4. Drücken Sie unter Beibehaltung der Position und der Nadelausrichtung des Celero
die grüne Taste, um die innere Kanüle auszulösen (Hub von 25 mm).
5. Drücken Sie die blaue Taste, um die schneidende Kanüle (Apertur von 22 mm)
auszulösen und einen Gewebekern zu entnehmen. Bei diesem Schritt wird automatisch
ein Vakuum erzeugt.
6. Entfernen Sie den Celero und lassen Sie dabei die Einführhilfe in der gewünschten
Position (sofern zutreffend). Die Einführhilfe kann vom Celero gelöst werden, indem der
Rastmechanismus an der Einführ-hülse heruntergedrückt wird.
7. Drücken Sie auf die schwarze Verriegelung, um den Betätigungshebel zu lösen.
8. Drücken Sie den Hebel einmal vollständig herunter, um die Vakuumquelle
zurückzuziehen.
9. Drücken Sie den Hebel ein zweites Mal vollständig herunter, um die schneidende
Kanüle zurückzuziehen.
10. Entnehmen Sie den Gewebekern. Der Hebel kann bei der Gewebekernentnahme
entweder vollständig heruntergedrückt oder vollständig losgelassen sein.
HINWEIS: Seien Sie bei der Gewebekernentnahme von der Apertur des Celero
vorsichtig. Kommen Sie während der Biopsie zu keiner Zeit mit den Fingern in die Nähe
oder an die Apertur. Die schneidende Kanüle ist eventuell geladen und kann ausgelöst
werden, was zu einer Verletzung des Bedieners führt.
11. Um weitere Kerne zu entnehmen, drücken Sie den Hebel ein drittes Mal vollständig
herunter, um die innere Kanüle zurückzuziehen und die Schritte 1 bis 8 dieses
Abschnitts wiederholen.
12. Wenn Sie mit der Entnahme fertig sind, entfernen Sie das Celero und die
Einführhilfe (sofern zutreffend) und entsorgen Sie sie vorschriftsmäßig.
13. Für das Setzen eines Biopsiestellenmarkers kann die Einführhilfe in der
gewünschten Position verbleiben.
14. Setzen Sie den Biopsiestellenmarker nach Bedarf gemäß den Herstelleranweisungen
ein.
A página está carregando ...
A página está carregando ...
A página está carregando ...
A página está carregando ...
A página está carregando ...
A página está carregando ...
A página está carregando ...
A página está carregando ...
A página está carregando ...
A página está carregando ...
A página está carregando ...
A página está carregando ...
A página está carregando ...
A página está carregando ...
A página está carregando ...
A página está carregando ...
A página está carregando ...
A página está carregando ...
A página está carregando ...
A página está carregando ...
A página está carregando ...
A página está carregando ...
-
 1
1
-
 2
2
-
 3
3
-
 4
4
-
 5
5
-
 6
6
-
 7
7
-
 8
8
-
 9
9
-
 10
10
-
 11
11
-
 12
12
-
 13
13
-
 14
14
-
 15
15
-
 16
16
-
 17
17
-
 18
18
-
 19
19
-
 20
20
-
 21
21
-
 22
22
-
 23
23
-
 24
24
-
 25
25
-
 26
26
-
 27
27
-
 28
28
-
 29
29
-
 30
30
-
 31
31
-
 32
32
-
 33
33
-
 34
34
-
 35
35
-
 36
36
-
 37
37
-
 38
38
-
 39
39
-
 40
40
-
 41
41
-
 42
42
em outros idiomas
- español: Hologic Celero Instrucciones de operación
- français: Hologic Celero Mode d'emploi
- italiano: Hologic Celero Istruzioni per l'uso
- English: Hologic Celero Operating instructions
- Nederlands: Hologic Celero Handleiding
- Deutsch: Hologic Celero Bedienungsanleitung
Artigos relacionados
-
 Hologic Celero Instruções de operação
-
 Hologic Brevera Breast Biopsy System Biopsy Needle Instruções de operação
-
 Hologic ATEC Breast Biopsy and Excision System Introducer Localization System Instruções de operação
-
 Hologic SecurMark Instruções de operação
-
 Hologic SecurMark Instruções de operação
-
 Hologic CeleroMark Instruções de operação
-
 Hologic SecurMark Instruções de operação
-
 Hologic Eviva Stereotactic Guided Breast Biopsy System Instruções de operação
-
 Hologic Eviva Stereotactic Guided Breast Biopsy System Handpiece Instruções de operação
-
 Hologic ATEC Breast Biopsy and Excision System Ultrasound Introducer Instruções de operação


